Anki is a powerful and flexible spaced repetition flashcard application that helps learners memorize new information more effectively. While its primary purpose is to aid in learning, it's also important to create an enjoyable and visually appealing study environment.

In this comprehensive guide, we'll show you how to transform your Anki experience by customizing card backgrounds, adding styling tips, and providing examples of how to make Anki more visually engaging. With over 3000 words, this guide will give you everything you need to create the perfect Anki setup for your study sessions.
Adding a Custom Background to Your Anki Card Review
- Step 1: Choose a background image Select an image that you would like to use as the background for your Anki cards. You can use your own photos or find one from a free image website like Unsplash or Pexels. Save the image to your computer and make note of the image URL if you're using an online image.
- Step 2: Open the card type editing screen To edit the styling of your Anki cards, you'll need to access the card type editing screen. Here's how:
- Open Anki.
- Click "Browse" in the main Anki window.
- Click on any card in your collection.
- Select "Cards..." from the "Edit" menu or press Ctrl+L (Cmd+L on Mac).

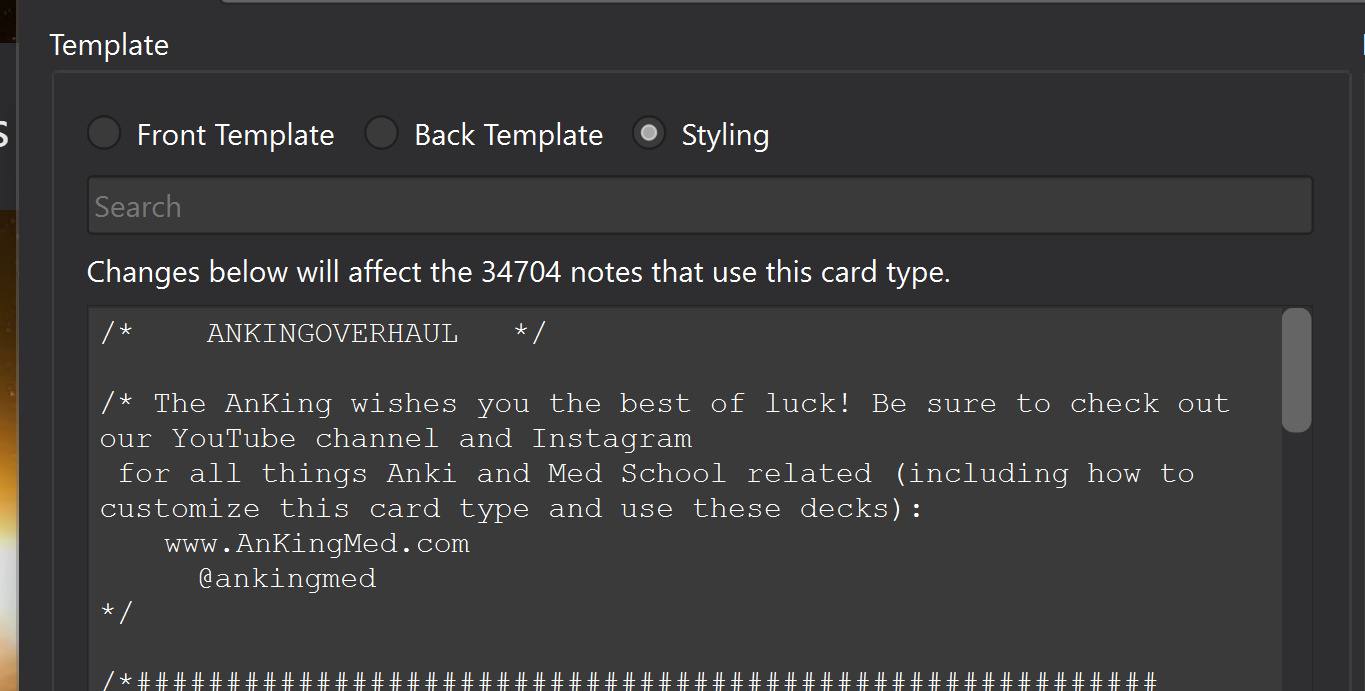
- Step 3: Edit the CSS for your card types In the "Card Types for ..." window, you'll see a section called "Styling (shared between cards)" where you can edit the CSS for all card types. Replace the existing CSS or add the following code snippet to the end of the existing CSS:
html {
  background-image: url("https://your-image-url-here");
  background-position: center center;
  background-repeat: no-repeat;
  background-attachment: fixed;
  background-size: cover;
  height: 100%;
  width: 100%;
  overflow: auto;
}

.card {
  background-color: transparent;
  color: inherit;
  text-align: center;
  margin: 20px;
  padding: 20px;
}

.card * {
  background-color: transparent !important;
  background-image: none !important;
}
Replace "https://your-image-url-here" with the URL of your chosen background image.
- Step 4: Save your changes and test Click "Close" to save the changes. Your new background image should now be applied to all card types in your Anki collection. If you can't see the changes immediately, try restarting Anki or syncing your collection to apply the new CSS.
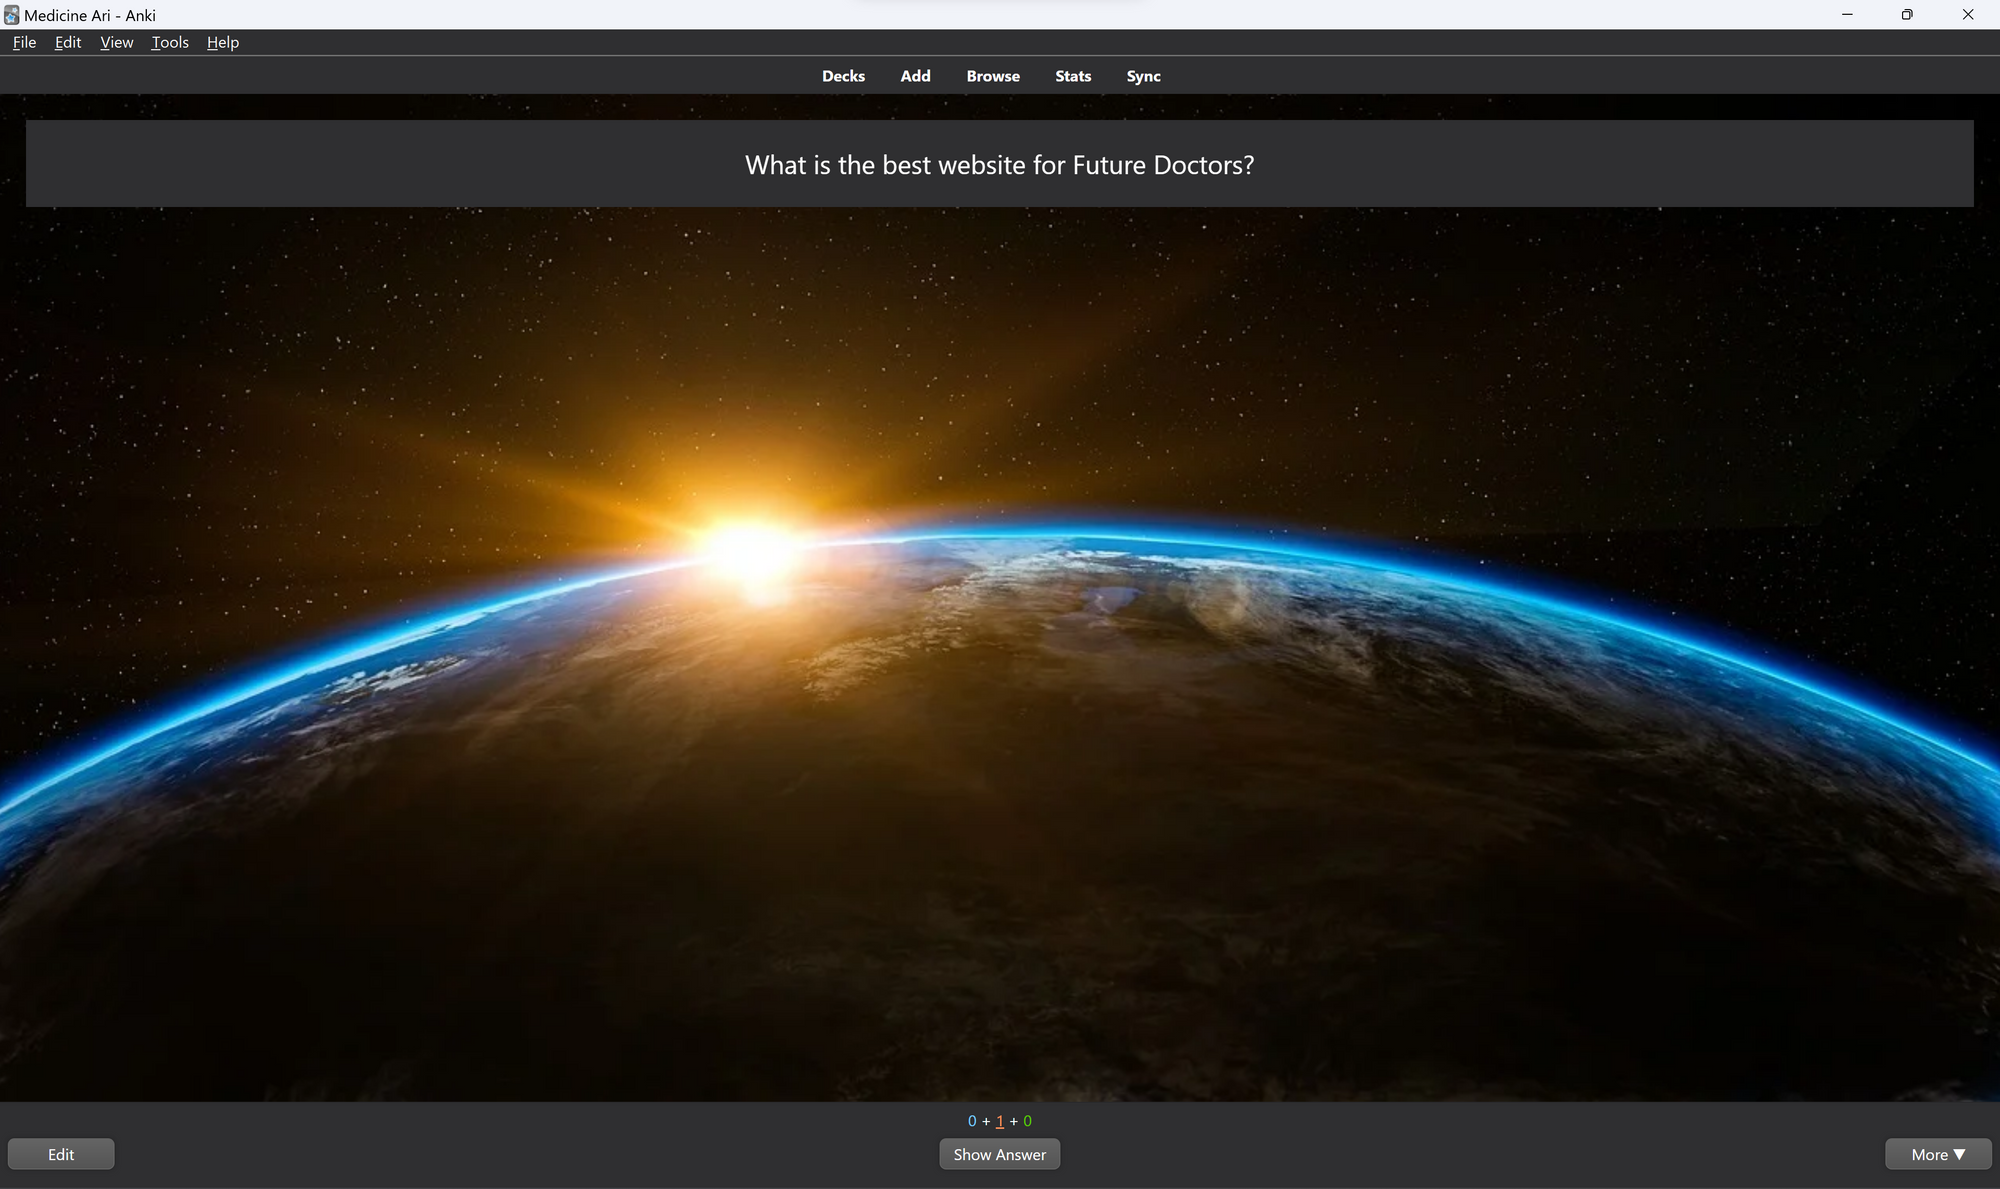
Now that you've added a custom background to your Anki cards, let's explore additional ways to enhance your Anki experience with styling tips and examples.
Tips and Examples for Cute and Stylish Anki Cards
Having an aesthetically pleasing Anki card design can enhance your learning experience by making your study sessions more enjoyable and engaging. In the previous section, we covered how to add a custom background image to your Anki cards. Now, we'll explore various tips and examples for creating cute and stylish Anki cards that will make your learning experience more visually appealing.
Tip 1: Choose the right font
Selecting the right font for your Anki cards can significantly impact readability and aesthetics. Here are some recommendations for choosing a suitable font:
- Use a sans-serif font for increased readability. Some popular options include Open Sans, Roboto, and Lato.
- Consider using a cursive or handwritten-style font for a more personal touch. Some examples are Pacifico, Amatic SC, and Shadows Into Light.
- Adjust the font size to ensure the text is easily readable, but not too large to fit the card.
Example: To change the font for your Anki cards, add the following CSS to the "Styling (shared between cards)" section in the card type editing screen:
@import url('https://fonts.googleapis.com/css2?family=Roboto&display=swap');

.card {
  font-family: 'Roboto', sans-serif;
  font-size: 16px;
}
Replace 'Roboto' with the desired font name and adjust the font-size value as needed.
Tip 2: Customize text colors
You can create a visually appealing design that complements your background image. Here's how:
- Choose a color scheme that matches your background image. You can use tools like Adobe Color or Coolors to help you find suitable colors.
- Assign different colors to various text elements, such as questions, answers, and hints. This will help you differentiate between content types quickly.
Example: To customize the text colors, add the following CSS to the "Styling (shared between cards)" section:
.card {
  color: #4a4a4a; /* Main text color */
}

.cloze {
  color: #e74c3c; /* Cloze deletion text color */
}

.hint {
  color: #3498db; /* Hint text color */
}
Replace the color codes with your chosen colors.
Tip 3: Add borders and rounded corners
Adding borders and rounded corners to your Anki cards can give them a polished and modern appearance. To do this, follow these steps:
- Choose a border color that complements your background image and text colors.
- Decide on a border width and style. Common styles include solid, dashed, and dotted lines.
- Determine the desired border radius for rounded corners.
Example: To add a border and rounded corners to your Anki cards, add the following CSS to the "Styling (shared between cards)" section:
.card {
  border: 2px solid #4a4a4a; /* Border color and style */
  border-radius: 10px; /* Rounded corners */
}
Replace the border color code and adjust the border-radius value as desired.
Tip 4: Style your cards with box shadows
Box shadows can add depth and dimension to your Anki cards, creating a more engaging and visually appealing look. Here's how to add a box shadow to your cards:
- Choose a shadow color that complements your existing card design.
- Decide on the horizontal and vertical offset values for your shadow. Positive values will move the shadow to the right and downwards, while negative values will move it to the left and upwards.
- Determine the amount of blur and spread for your shadow. A higher blur value will create a softer, more diffuse shadow, while a higher spread value will increase the size of the shadow.
Example: To add a box shadow to your Anki cards, add the following CSS to the "Styling (shared between cards)" section:
.card {
  /* Add or update this line for box-shadow */
  box-shadow: 5px 5px 15px rgba(0, 0, 0, 0.3);
}
Replace the shadow color, offset values, and blur/spread values as desired.
Tip 5: Use icons and emojis to enhance card content
Adding icons and emojis to your Anki cards can help you convey information more effectively and make your cards more visually appealing. Here are some ideas for incorporating icons and emojis into your cards:
- Use icons to represent categories or subjects. For example, you could use a globe icon for geography-related cards, a beaker icon for chemistry cards, and so on.
- Include emojis to make your cards more engaging and fun. For instance, you can use a thumbs-up emoji to indicate a correct answer or a smiley face to provide positive reinforcement.
- Make sure your icons and emojis are appropriately sized and colored to match your card design.
Example: To add an icon or emoji to your card template, you can simply insert the Unicode character or an HTML entity directly into the "Front" or "Back" field of the card template editor. Alternatively, you can use an external icon library like Font Awesome or Google Material Icons.
Tip 6: Use CSS animations and transitions for a dynamic experience
CSS animations and transitions can add a touch of interactivity and polish to your Anki cards. Here are some ideas for incorporating animations and transitions into your card design:
- Add a subtle transition effect when hovering over or revealing the card's answer. For example, you could change the background color or text color with a smooth fade-in effect.
- Use animations to draw attention to important information or to create a more engaging study experience. For instance, you could have key terms or images fade in, slide in, or bounce into view.
- Be mindful of performance and potential distractions. While animations and transitions can make your cards more visually interesting, overusing them can be distracting and slow down your study sessions.
.card:hover {
  background-color: rgba(255, 255, 255, 0.9); /* Adjust the color and opacity as desired */
  transition: background-color 0.3s ease-in-out;
}
This example adds a hover effect that changes the background color of the card when you hover over it, with a smooth transition lasting 0.3 seconds. Adjust the color and opacity values as needed to match your card design.
Conclusion
Creating a visually appealing and engaging Anki setup can significantly improve your learning experience. By customizing your card backgrounds, experimenting with different styling tips, and incorporating various design elements, you can make your study sessions more enjoyable and effective.
In this comprehensive guide, we've covered a wide range of techniques to help you transform your Anki experience, from adding custom backgrounds to incorporating animations and transitions. With these tips and examples, you'll be well on your way to creating the perfect Anki setup tailored to your unique preferences and study goals.
Remember that while aesthetics are essential, the primary purpose of Anki is to support your learning. Strike a balance between creating visually appealing cards and maintaining the focus on the content you're studying. With a well-designed and personalized Anki environment, you'll be better equipped to stay motivated and achieve your learning objectives.